Headshot Retouching Tricks

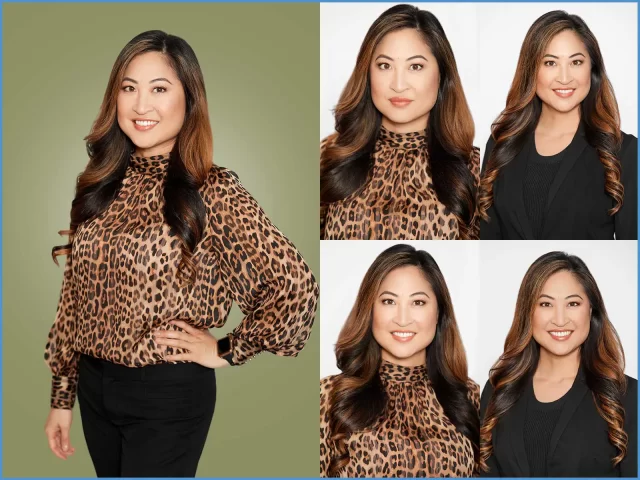
Several hacks or tips you can use to enhance your headshot and present yourself in the best possible light. After your virtual headshot session, getting retouching done can be completed by:
- Online retouching services: Many online platforms offer professional corporate headshot retouching services at affordable rates. You can upload your headshot and specify the retouching requirements, such as blemish removal, skin smoothing, or color adjustments. Some popular online retouching services include FixThePhoto, RetouchUp, and Fiverr. Compare prices and reviews to find a service that fits your budget.
- Student photographers or retouchers: Contact local photography schools or art colleges to see if any students are offering retouching services. Students often provide services at lower rates to gain experience and build their portfolios. Supporting emerging talent can be easy by asking to be the first photos for up and coming photographers.
- Freelance retouchers: Look for freelance retouchers on platforms like Upwork, Freelancer, or Fiverr. Many experienced retouchers offer their services at competitive prices. Review their portfolios, read client reviews, and discuss your retouching requirements to negotiate a budget-friendly deal.
- Photography meetup groups: Join local photography meetup groups or forums and connect with photographers or enthusiasts. They might be willing to exchange retouching services for networking opportunities or other non-monetary arrangements. Building connections within the photography community can lead to cost-effective collaborations.
- DIY retouching: If you have some basic photo editing skills, you can try retouching your headshots yourself. Software like Adobe Photoshop or Lightroom, or free alternatives like GIMP or Pixlr, provide tools for blemish removal, skin retouching, and color adjustments. There are numerous tutorials available online to guide you through the retouching process.
A guide on how to make a professional headshot background using Canva

- Sign in or create an account: Visit Canva’s website (www.canva.com) and sign in to your existing account or create a new one if you don’t have an account already.
- Choose a blank canvas: Once you’re logged in, click on the “Create a design” button located on the top right corner of the Canva homepage. In the search bar, type “custom dimensions” and select the “Custom dimensions” option that appears. Enter the dimensions for your headshot, such as 1080 pixels by 1080 pixels, to create a square canvas.
- Upload your photo: After creating a blank canvas, click on the “Uploads” tab in the left sidebar and then click on the “Upload media” button. By selecting the photo that you want to use for your headshot from your computer and upload it to Canva.
- Position and crop the photo: Once your photo is uploaded, drag and drop it onto the canvas. By adjusting the positioning and sizing of the photo to fit within the square canvas. Also you can use the crop tool to further refine the composition if needed.
- Enhance the photo: Canva provides basic editing tools to enhance your photo. By clicking on the photo and then selecting the “Filter” option in the top toolbar. Experiment with different filters to improve the colors and overall look of your headshot. Additionally, you can adjust the brightness, contrast, saturation, and other settings using the “Adjust” option.
- Add text or elements: To make your headshot more professional and informative, consider adding text or elements. By clicking on the “Text” tab wihtin the left sidebar to access Canva’s text tools. Add your name, job title, or any other relevant information. You can then experiment with different font styles, sizes, and colors to find the right look. You can also explore the “Elements” tab to add icons, shapes, or other graphical elements.
- Customize the background: If you want to change the background of your headshot, you can do so in Canva. Click on the “Background” tab in the left sidebar and choose a solid color, gradient, or a background image from Canva’s library. Adjust the transparency or add effects as desired.
- Save and download your headshot: Once you’re satisfied with your professional headshot, it’s time to save and download the final image. Within the Canva editor interface you can click on the “download” button on the top right hand corner of the Canva editor interface. Choose the desired file format (e.g., JPG or PNG) and the image quality. Select your preferences and click on the “Download” button to save the headshot to your computer.
While Canva offers a user-friendly interface and basic editing tools, keep in mind that it may give you the same level of customization capabilities and fine-tuning as professional headshot editing software. If you require more advanced editing or retouching, you may need to consider using dedicated photo editing software or professional services.
Different Headshot Retouching Apps
There are also many FaceTune Type Apps including:
- YouCam Makeup.
- Face App.
- AirBrush.
- FaceTune.
- Beauty Plus.
- YouCam Perfect.
- Peachy.
- VSCO.
- & More.
Once you get your virtual headshot, you can use any of these types of software and methods to make sure affordably that you get the best results. Contact Capturely today for all of your online headshots.
All of our virtual headshots come with an unconditional satisfaction guarantee, and we will work with you to make sure that you get the perfect image for your needs. So contact us today for your virtual headshots!


